
Last weekend I baked the first recommended bread from this book. It’s the Saturday White Bread – page 81. It’s a straight dough recipe. It turned out to be a great single day (everything required to make this bread can be done within a single day) bread bake. This is my story of that experience.
For anyone that has a copy of the book you’ll know one of it’s great features to be the timing guide provided for each recipe. As with all good baking books, it also lays out weights rather than measurements. Many a baked good has been unsuccessful at the hand of an over or under packed cup of flour, sugar or the like. Bread making, like all baking is as much about chemistry as artistry. Not to mention tender loving care.
Unfortunately the desire struck me to bake before I was able to confirm my pantry was able to accommodate my intentions! As a result the flour mix wasn’t exactly the same as outlined in the book. Vital stats below on this bake, as much for my record keeping as anything else.
Weights and measurements : 550 grams all purpose; 350 grams caputo 00; 100 grams whole wheat; autolyse with 720 grams of water at a temperature 95 degrees, brought down to 88 degrees after mixing and resting; 21 grams of fine sea salt and 4 grams of commercial yeast; post mixing temperature of 82 degrees; shaping temperature 78 degrees; room temperature for most of the day was about 73 degrees.
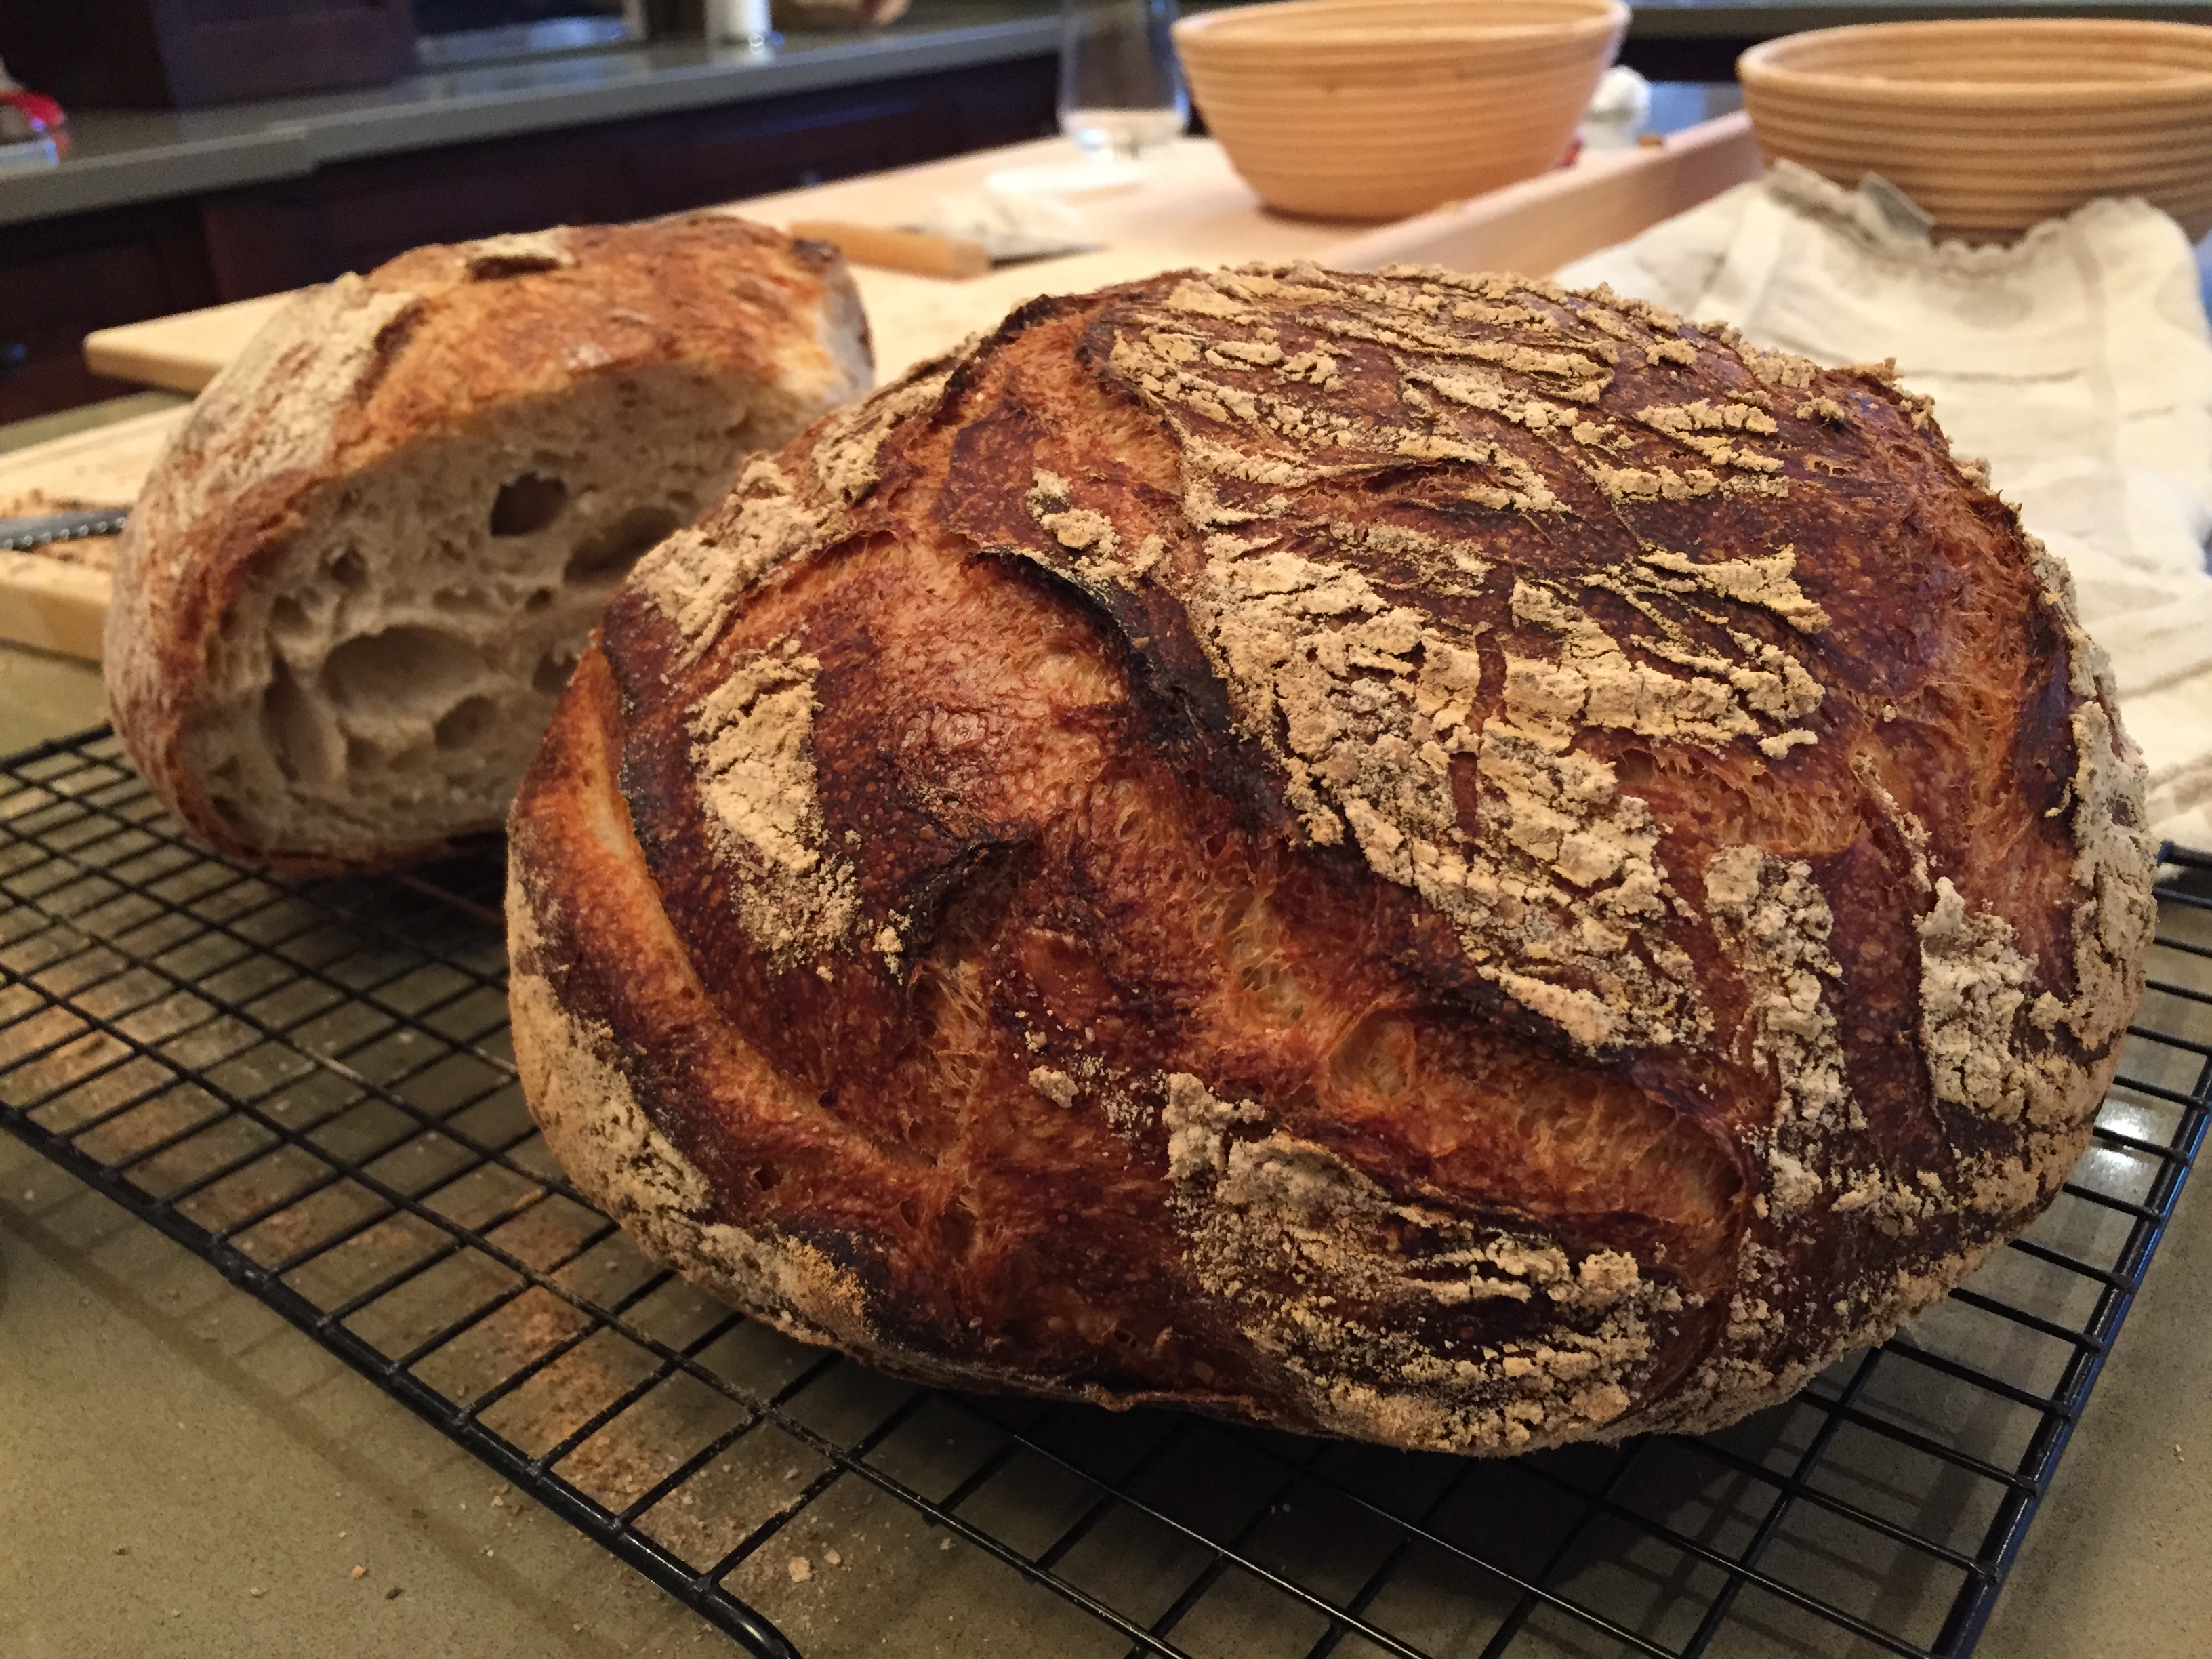
Timeline: autolyse at 9:40am; first fold by 10:10am; second fold by 10:45am; third fold at 11:20am; shaped at 4:25pm; proofed and baked at 475 degrees lower middle rack (dutch oven method) by 5:30pm; 30 minutes with lid on; first loaf an additional 15 minutes to a golden brown; second loaf 18 minutes to a nice dark brown.
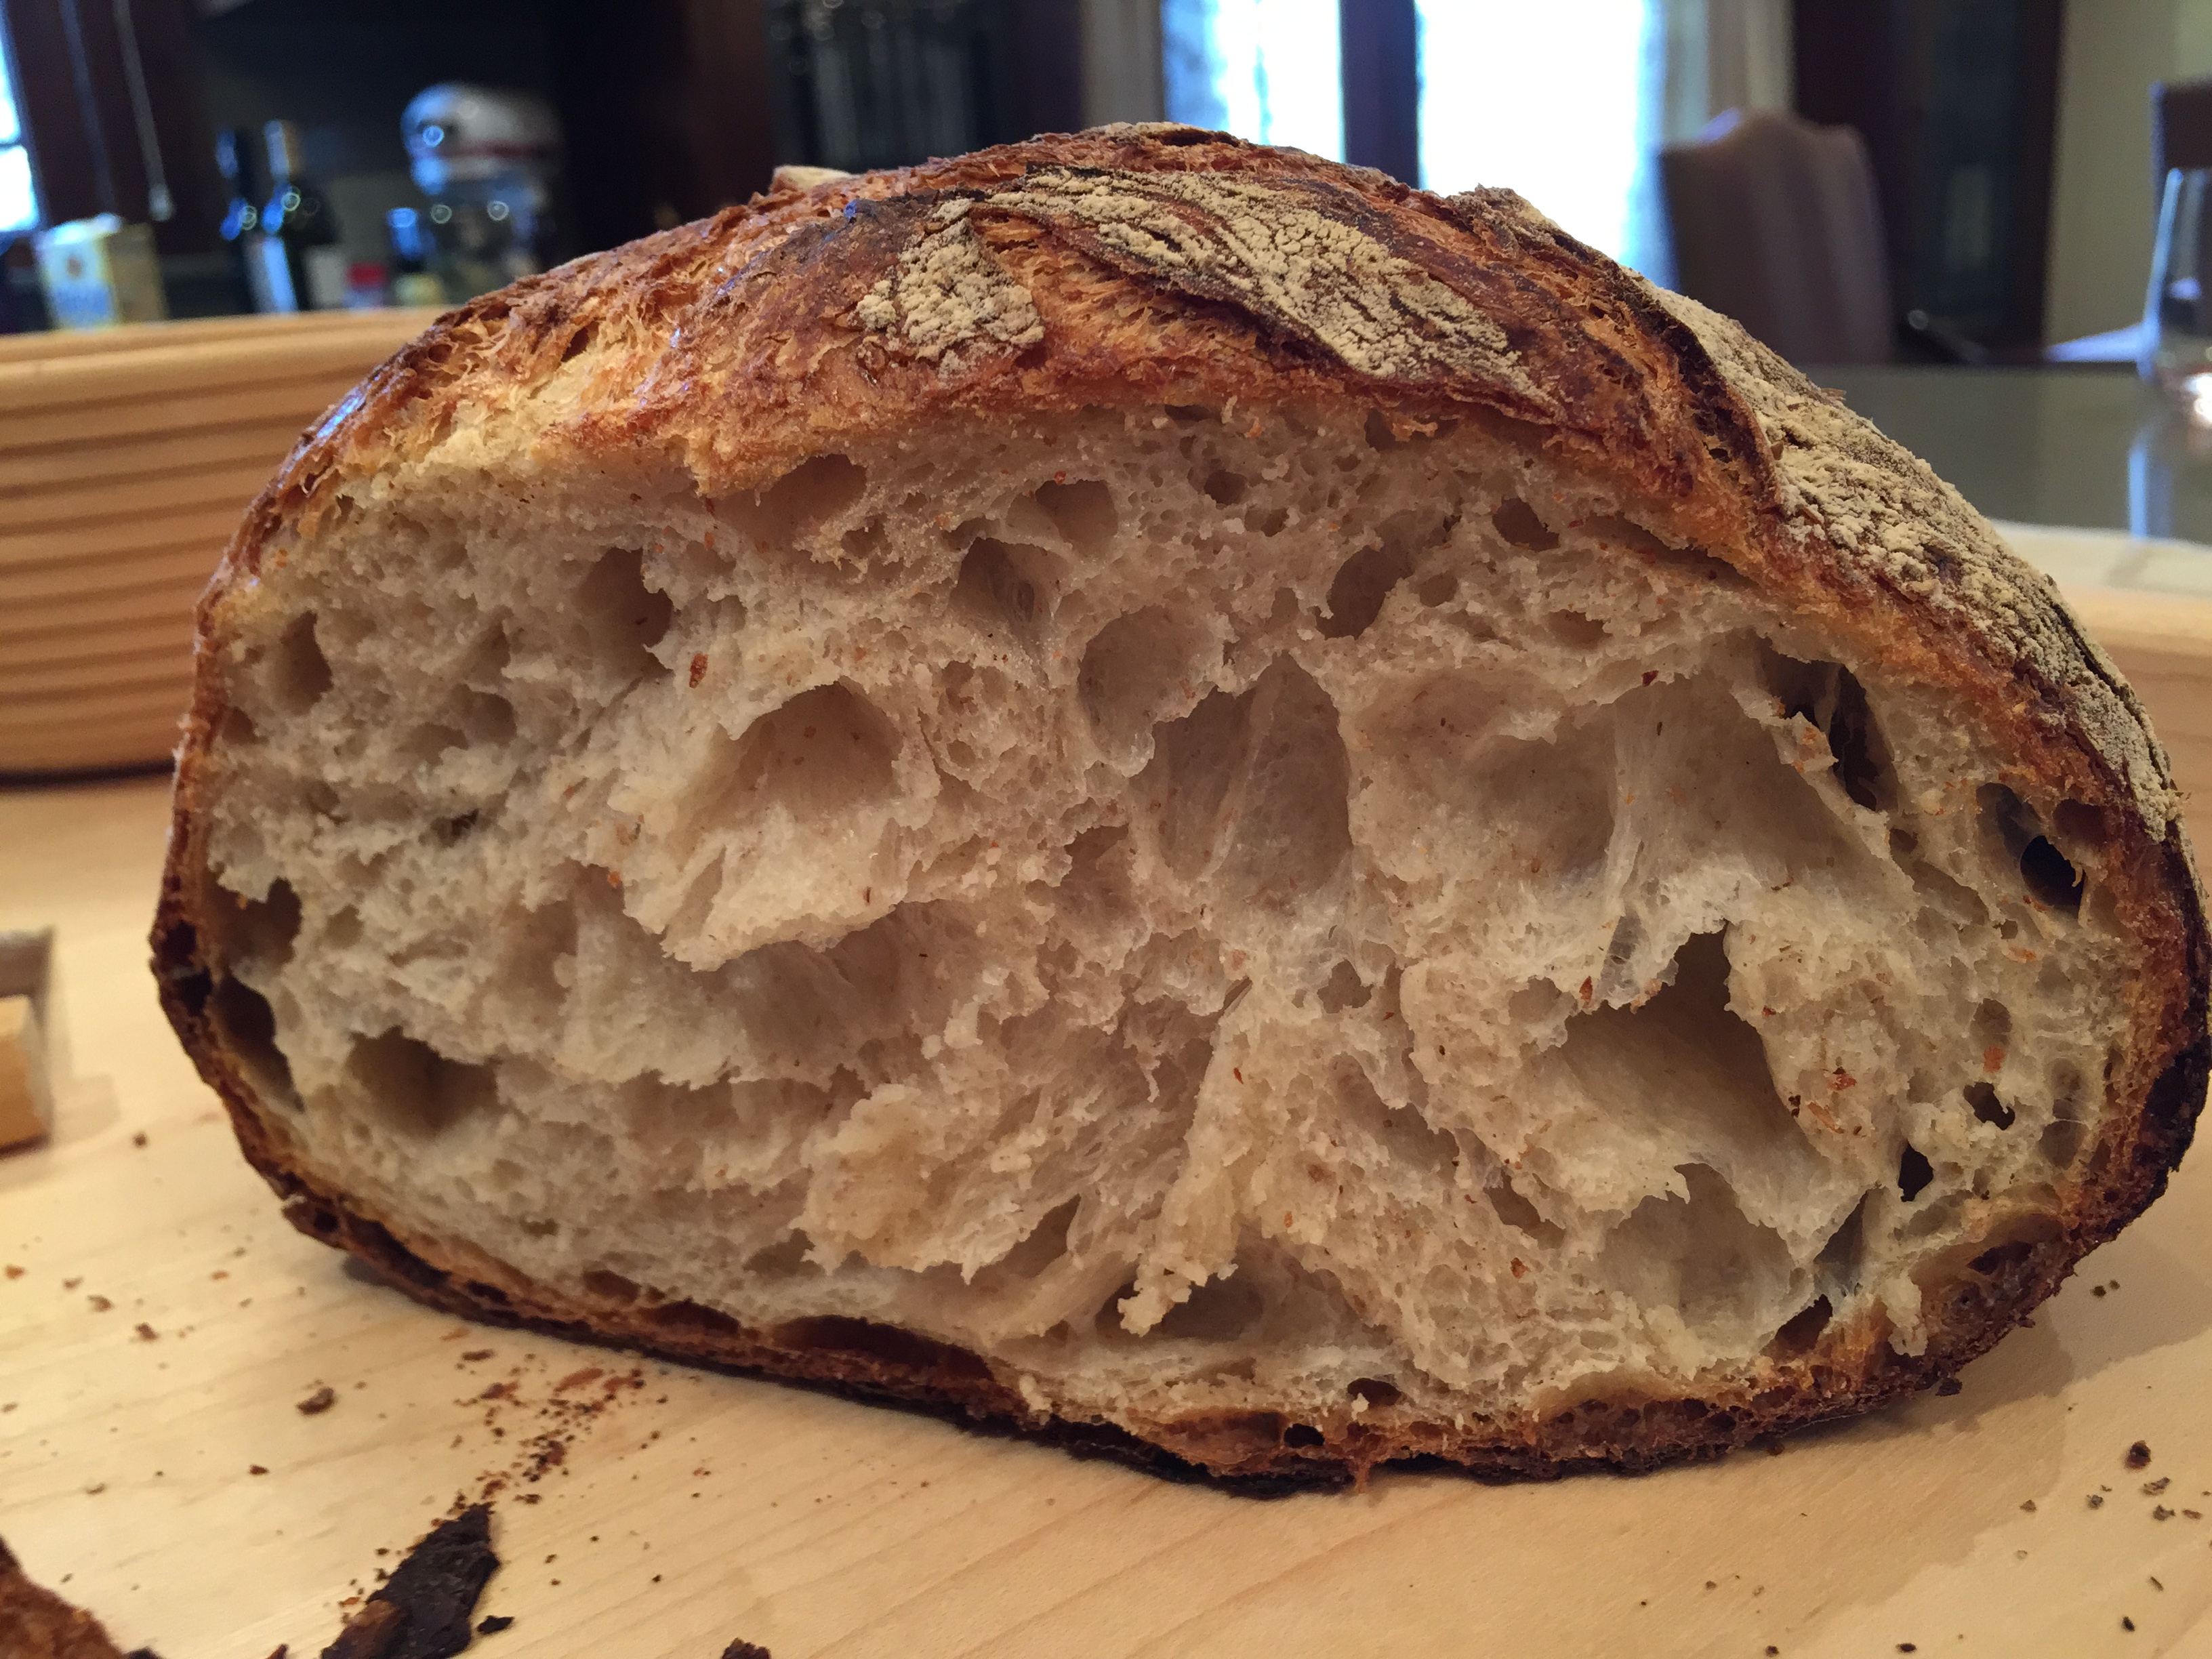
Results: The smell, taste and crust of both loaves was superb. They had a great crunchy crust, were not chewy, and the flavours were nicely aromatic. The second loaf benefited from the few extra minutes without the lid and I would recommend the extra time. The pot sat low in my oven (on the second from bottom rack level) and the bottoms were a bit darker but not entirely burned. Using a higher rack setting next time should solve this problem as it would put the pot further away from the heat source at the bottom of the oven. On the second day the bread tasted even better! Toasted it was superb. But clearly this bread, need to be cooled completely to allow it’s true flavours and character to be appreciated. This also gave the crust a bit more crunch and less chew. Truly a “wow” bread.
Pictures

Interesting. I picked up this book in November and Santa gave me some extra tools, so I’ve just started the journey you’ve almost completed. I enjoyed the Saturday white bread. Definitely a step above those in AB5D. Looking forward to the rest. Cheers from #YVR.
LikeLike
WOW! Great site! I can’t believe how much oven rise and large holes your finished bread has. You nailed it! Your bread looks as good or better than the book!
Alas my oven only, goes to 500 and room temperature is typically 75 F and higher here in Miami…
Any tips? My bread comes out overly dense with small holes and often gets very sticky inside after 2 or 3 days.
LikeLike
Thank you for the comments. 500 on the stove is all you need. My house can get hot in the summer too. I think you need to look at the dough and NOT go by the Forkish time lines. Many people have found that his times are too long and the bread over develops. And then you don’t get a good rise or structure. Think about what you want to happen – lets say for the dough to double, if the book says that takes 5 hours, ignore the book. When the dough has doubled (even if it only takes you 2.5 hours, move on to the next step). That will make a world of difference! Also, check out http://www.thefreshloaf.com I use that site all the time for helpful advice and information on bread baking (not a commercial, I just like it as a way of connecting to other bread bakers). Other than that, just be sure you’re weighing all your ingredients with a scale! Good luck!
LikeLike
I just made this bread yesterday and my crumb did not have the large air pockets and looked much denser on the inside.
Here is what I did, I cut the recipe in half so I used 500 grams of bread flour (next time will probably use KA All purpose), 360 grams of water at 94 degrees and 11 grams of salt and 2 grams instant yeast. I folded the bread a total of 2 times which is what he says in the book, not counting the 1st fold when mixing in the salt and yeast. I let the dough ferment for around 4 hours. I shaped it and let it proof for an hour, it seemed to pass the finger dent test. During the shaping process there was one mishap when the top of the dough ripped and I had to reshape it into a boule the second time. I think this probably where I went wrong.
The bread came out much more dense than I expected with minimal air pockets. The flavor of the bread was absolutely delicious tho, chewy crust and crumb. I let it cool for about 30 minutes before cutting it open.
Any suggestions for how to improve this attempt to get the big air pockets? Use All purpose flour, shorter bulk fermentation or longer, be more careful in shaping, did I maybe overproof it?
LikeLike
Hi Roman.. I would give the dough four stretch and folds within the first two to three hours. Each time you stretch and fold, you’re actually pulling up and stretching over each of the four sides of your dough.. as you get to the last one, you’ll realize it’s getting lighter as it’s filling with air, so be gentle with it. The stretch and folds help form gluten to give you better structure within the bread. When you go to shape, yes be careful. Ripping the dough will definitely impact the oven bloom. I’d also let the bread sit for many hours to cool down. Even the next day. I find the breads taste best the next day after a good cool down! That’s why you make two! Stick with the bread flour. As to overproofing.. don’t use his times. Many people find they are much too long. You could have over-proofed – can’t tell without seeing the bread. Let the bread tell you when to move to the next step, not the clock.. and re-read the recipe as to process.. it takes a few loaves to catch on, but you’ll get there.. Bake happy.. and check out http://www.thefreshloaf.com – lots of great bakers willing to help there!
LikeLiked by 1 person
Just a quick follow up question how long do you wait before doing the FIRST stretch and fold after mixing the dough with salt + yeast?
LikeLike
About 30 minutes.. re-read the recipe.. it’s all there.. enjoy!!
LikeLike
Have you ever had a problem with the loaf sticking to the bottom or sides of the dutch oven? I have made about six loaves this way and none but the last one has had this problem. The bottom of the loaf was a little more charred as well. I’m using a 4,5 qt Le Cuistot enameled D.O. @ 475 degrees.
It’s interesting that just as I fix one flaw in my technique, new ones pop up. The bread tastes great but the journey to consistent, perfect bread is humbling!
I’m thinking about maybe cutting the batch into thirds instead of in half and making slightly smaller loaves. Also, maybe run the oven a few degrees cooler.
Do you have any suggestions that would help me prevent this from happening in the future?
LikeLike
Hi Anthony.. I haven’t ever had a loaf stick to the dutch oven other than once when I left it in too long and it burnt a bit. I’m assuming that’s not your problem. But to be clear, I’m putting the dough in after the DO has been heated in the oven. I placed the DO – with lid on – into the oven cold and then turn it on to 475/500. It warms up with the oven and I leave it in at full temp for about 15 minutes after it reaches full temp, and before loading the dough into it. You could try to place a circle of parchment paper onto the bottom of the DO immediately before (not while warming up) loading the dough into it. Also, make sure you’re using the oven’s middle rack – and not too close to the bottom of your oven (where it’s the hottest).
As to being humbled – absolutely! But it’s a great journey..
You could cut your batch into thirds, but that’s not causing your problem – nor is the temp of your oven, but going down to 450 should work too if you’d like to give that a try.
If you have any pictures, I’d look to http://www.thefreshloaf.com . Load your pictures and questions there (I’m on there too). Lots of great people around to help!
Good luck – and bake happy!
LikeLiked by 1 person
Thank you for the great feedback. After writing to you and reviewing my notes, I’m pretty sure I was sloppy with my timing of the covered portion of the baking. The bottom burning and the bread sticking are mostly like due to being in too long. I have to become a bit more organized and maybe slow down too.
As far as cutting the batch into thirds, that’s probably more a realization that my wife and I can only eat so much fresh bread at a time. 🙂
LikeLike